The How To
pedestal Plug Page
Another way to do a short Y on Antelope
This is the easiest way I have ever done a short Y incision on Antelope. By using the small pedestal rod and following the instructions below you can see how easy this works
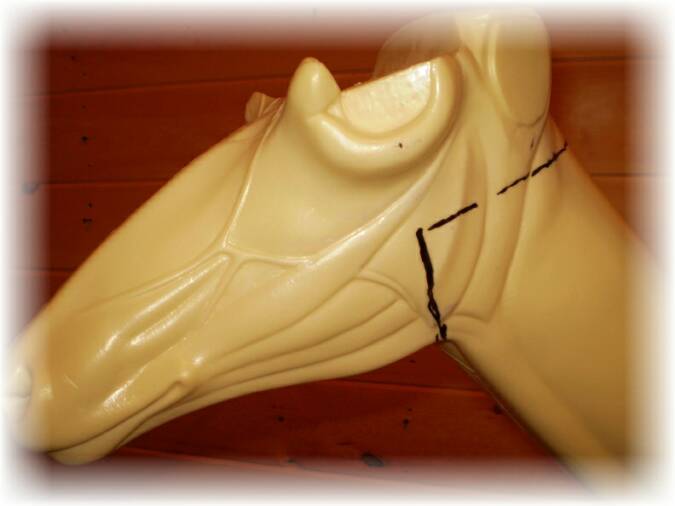
The first thing I do is measure down 2 1/2" from the horn plate on the form and mark it around the back of the head. and then I mark up from below the chin and connect to the other line.
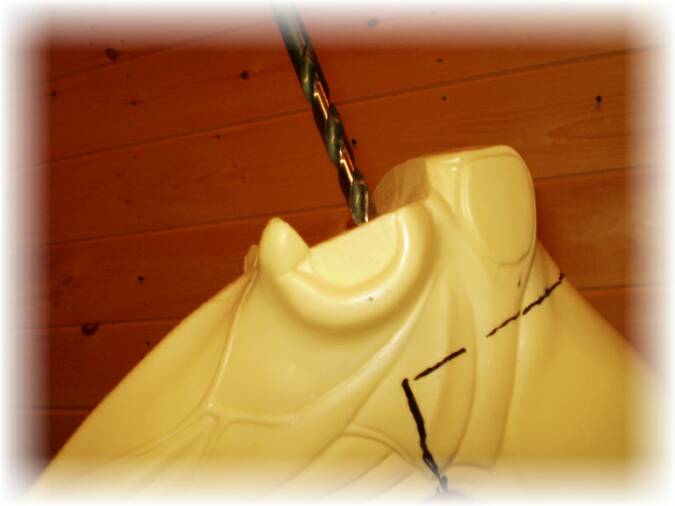
The next thing I do is drill a 1/2" hole down the center of the horn plate and and down into the neck of the form.
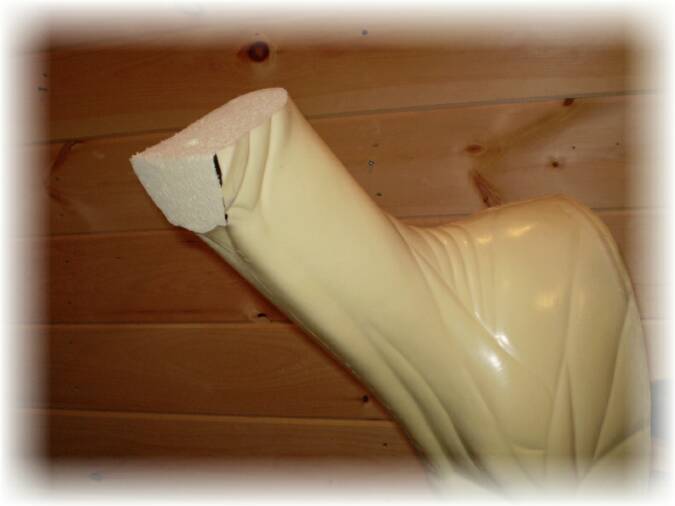
The next step is to cut the head off the form, along the marks. This method works better for me then then cutting a v wedge. The hide doesn't have the tendency to get hung up on the edges when putting it on the form.
The Plug In way for pedestal mounts
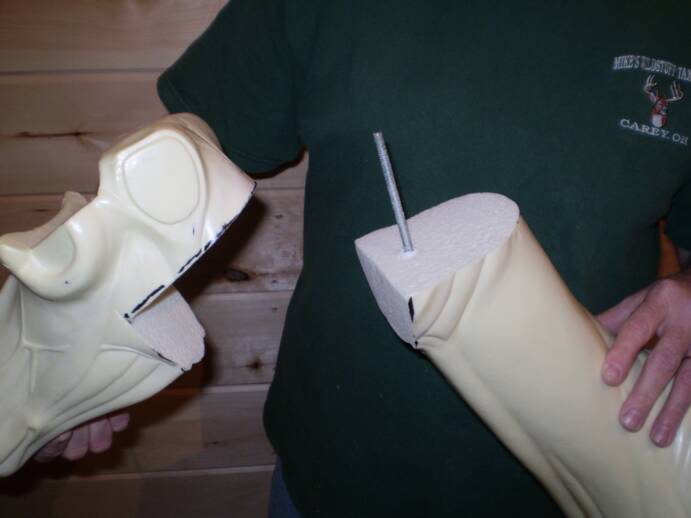
This is a new method of installing threaded rods into your game heads. They come in 4 different sizes and lengths - 1/4" x 6", 5/16" x 9", 3/8" X10" and 1/2" x 12" .
The 1/4" threaded rods and the 5/16" threaded rods come with a 1/2" plug 1 3/4" long.
The 3/8" threaded rods and the 1/2" threaded rods come with a 5/8" plug 3 3/4" long.
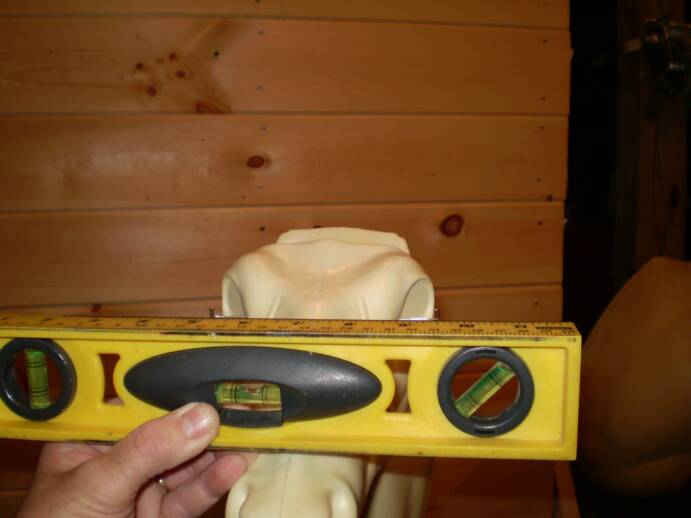
Start by leveling the form. Level the back first.
Next I use T pins in the front corner of the eyes and level the form horizontally.
When you have the form level rotate it upside down and level the line on the back up again.
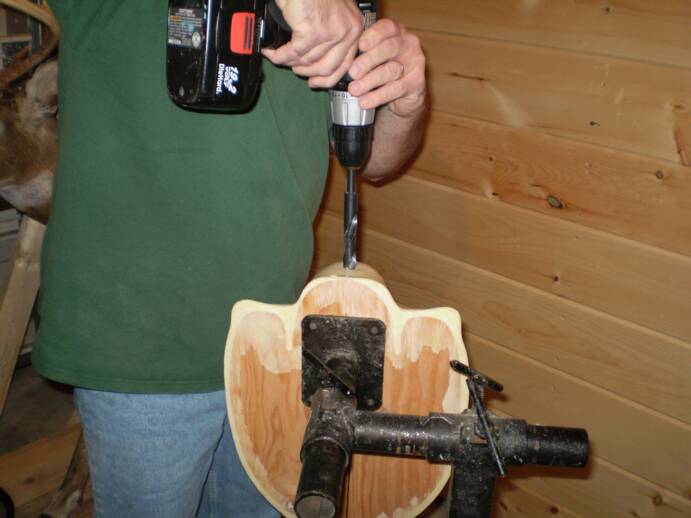
Now mark the center of the brisket where you want the pedestal rod to be . Drill your hole straight down keeping the level on your drill centered.
Note: This is the easiest way I have ever installed a pedestal rod. In the past i would drill a hole into the form with a spade bit and bondo a threaded rod in place, trying to keep it level while the bondo kicked. My way the pedestal rod is glued in level and it can't lean. I don't glue the rod in until the animal is mounted. I just fill for the hole in the brisket and cut a slice above the hole. Then I put glue in the hole and insert the pedestal rod. This way the pedestal rod won't get in your way while your mounting the animal.
Remember you can put these rods in as deep as you need them so make sure you drill your hole deep enough. Test fit the rod so you have the length you need sticking out. Mark the rod so its ready when your animal is mounted
Click here to add text.


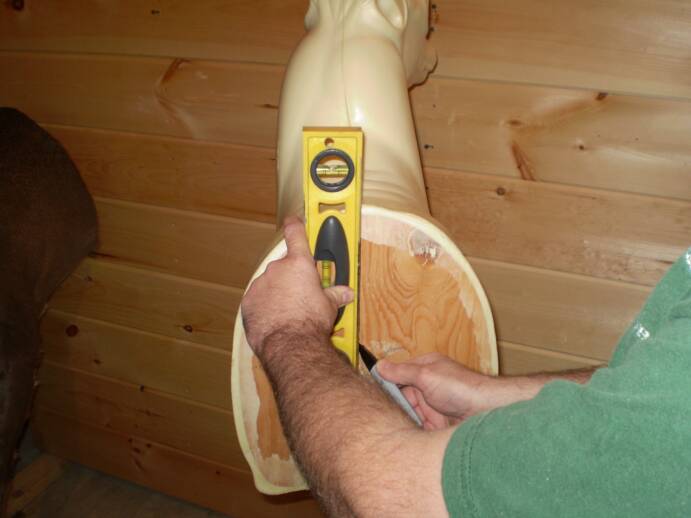
When you have the form level across the eyes, mark a level line on the back. You can mark horizontally or vertically.

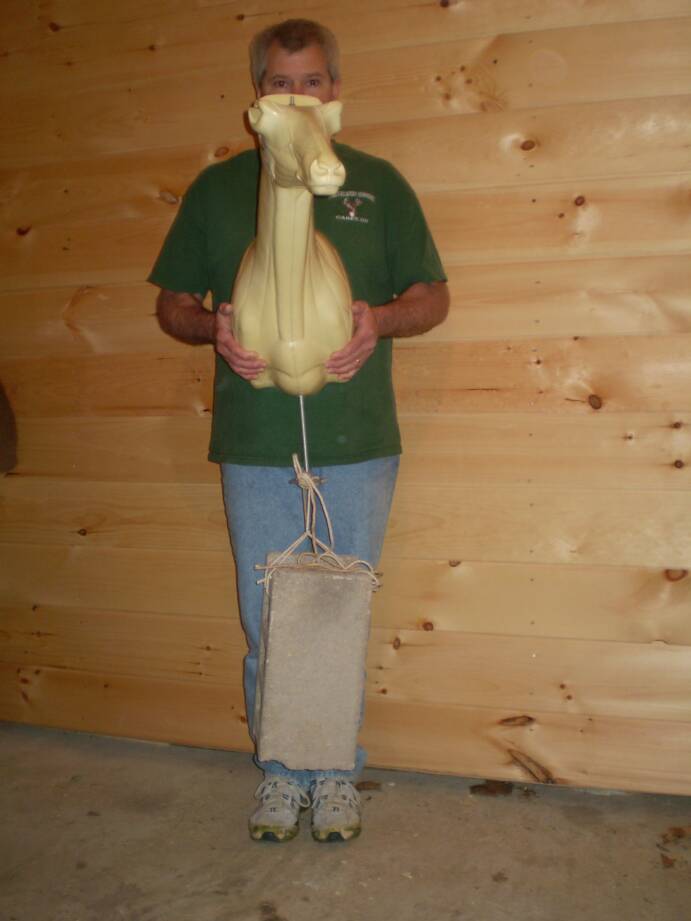
Now test fit the pedestal rod to make sure you have the right amount of threaded rod sticking out of the top of the head. Then glue the pedestal rod into the neck.
When you are ready to mount the Antelope you slide the head into the hide. Put Gorilla glue on the neck section where the two parts will be put together. Then slide the hide over the neck and line up the head so it will slide over the pedestal rod.

This is what the top of the head looks like when the nut is tightened. When you have the hide on the form and the nut is tightened you can start setting your horns right away. The threaded rod will hold everything in place until the glue dries
Note: This is the way I do it. I came up with this Idea and when I tried it, I could not have been more excited with how well it worked. This method allows me to get away with a much shorter Y incision.